Choosing the right microcement finish for your bathroom
When it comes to transforming your bathroom, selecting the right microcement finish is crucial. There are several types of finishes available, each with its own set of pros and cons. For instance, a matte finish offers a subtle, non-reflective look that's perfect for creating a calm, spa-like atmosphere. On the other hand, a satin finish provides a slight sheen, adding a touch of elegance without being too flashy. If you're looking for something more striking, a gloss finish can make your bathroom appear larger and more luxurious, but it may require more maintenance to keep it looking pristine.
Here's a quick comparison to help you decide:
|
Finish Type |
Durability |
Maintenance |
Cost |
|
Matte |
High |
Low |
Moderate |
|
Satin |
Medium |
Moderate |
Moderate |
|
Gloss |
Medium |
High |
High |
When choosing the best finish for your bathroom, consider the size and lighting of the space. A gloss finish can make a small bathroom feel larger by reflecting more light, while a matte finish can help create a cosy, intimate atmosphere in larger spaces. Additionally, think about the maintenance you're willing to commit to; a gloss finish may look stunning, but it will show water spots and fingerprints more easily than a matte or satin finish. By weighing these factors, you can select the perfect microcement finish to enhance your bathroom's aesthetic and functionality.
Preparing your bathroom for microcement application
Transforming your bathroom with microcement starts with meticulous preparation. First, ensure the surface is spotless. Cleaning is crucial; any dirt, grease, or old paint can compromise the finish. Use a strong detergent and a scrub brush to remove all residues. If there are any damages like cracks or holes, repair them with a suitable filler. Experts' advice: a smooth, even surface is key to a flawless microcement application. Next, protect your fixtures and fittings. Cover taps, sinks, and bathtubs with plastic sheets and secure them with masking tape. This prevents any accidental splashes or spills from ruining your bathroom's existing features. Protecting fixtures is not just about aesthetics; it also ensures that the microcement adheres only where you want it. Before you start, gather all necessary tools and materials. You'll need a trowel, mixing bucket, protective gloves, and the microcement mix itself. A checklist can be a lifesaver here. Preparation tasks typically take a day or two, depending on the size of your bathroom and the extent of repairs needed. Allocate enough time to do it right; rushing through this phase can lead to subpar results.
Step-by-step guide to applying microcement
Transforming your bathroom with microcement can be a game-changer, but it's crucial to follow a clear, manageable process. Let's break it down. First, ensure you have all the necessary materials: microcement mix, primer, trowel, and sealer. Start by priming the surface to ensure the microcement adheres properly. Mix the microcement according to the manufacturer's instructions, aiming for a smooth, lump-free consistency. Apply the first layer with a trowel, maintaining an even thickness. Allow it to dry for 24 hours before applying subsequent layers.
Common mistakes to avoid include over-mixing the microcement, which can lead to air bubbles, and applying layers that are too thick, which can cause cracking. A typical timeline for the entire process, from priming to sealing, is about a week. Here's a quick comparison table to help you visualise the process:
|
Step |
Time Required |
Tips |
|
Priming |
1 day |
Ensure surface is clean and dry |
|
First Layer Application |
1 day |
Apply evenly with a trowel |
|
Drying Time |
24 hours |
Allow to dry completely |
|
Subsequent Layers |
2-3 days |
Apply thin, even layers |
|
Sealing |
1 day |
Use a high-quality sealer |
For a visual reference, consider looking at before and after photos of microcement projects. These can provide inspiration and a realistic expectation of what you can achieve. Remember, the key to a successful microcement application is patience and attention to detail. Happy renovating!
Maintaining your microcement bathroom
Keeping your microcement bathroom in top-notch condition doesn't have to be a chore. With the right approach, you can ensure it remains as stunning as the day it was finished. Here are some essential tips:
- Daily and Weekly Cleaning Routines: For daily cleaning, simply use a soft cloth or mop with a neutral pH cleaner. Avoid abrasive materials that could scratch the surface. Weekly, give your bathroom a more thorough clean using a mild detergent mixed with water. This will help maintain the microcement's sleek appearance.
- Best Cleaning Products: Opt for products specifically designed for microcement surfaces. These cleaners are formulated to be gentle yet effective, ensuring your bathroom stays spotless without damaging the finish. Avoid acidic or bleach-based cleaners as they can cause discolouration and wear.
- Handling Minor Repairs and Touch-Ups: Minor scratches or chips can be easily fixed with a microcement repair kit. These kits usually include a small amount of microcement and a sealant. Follow the instructions carefully to blend the repair seamlessly with the existing surface.
- Preventing Common Issues: To prevent staining, always wipe up spills immediately, especially those from coloured liquids like wine or coffee. For cracking, ensure your bathroom is well-ventilated to avoid excessive moisture build-up. Regularly inspect the surface for any signs of wear and address them promptly.
- Maintenance Schedule for Long-Term Care: Establish a maintenance schedule to keep your microcement bathroom looking its best. Monthly, check for any signs of damage and perform necessary touch-ups. Every six months, consider applying a fresh coat of sealant to protect the surface and enhance its durability.
By following these guidelines, you can enjoy a beautiful, low-maintenance microcement bathroom for years to come.
Discover microcement at www.festfloor.com
Inspiring microcement bathroom designs
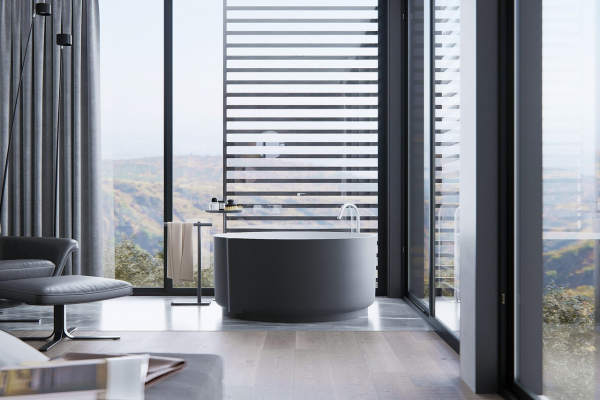
When it comes to transforming your bathroom, microcement opens up a world of design possibilities. Imagine sleek, modern surfaces that blend seamlessly with your existing decor. You can play with a variety of colour schemes and textures to create a unique look. For instance, pairing a cool grey microcement with warm wood accents can create a balanced, inviting space. Alternatively, you can opt for a bold, dark microcement finish combined with metal fixtures for an industrial vibe. The versatility of microcement allows you to experiment and find the perfect combination that suits your style.
Accessorising is key to enhancing the microcement look. Think about adding minimalist accessories like sleek mirrors, floating shelves, and modern lighting to complement the clean lines of microcement surfaces. Incorporating natural elements such as plants or wooden stools can add warmth and texture to the space. Don't just take our word for it; many homeowners have shared their success stories. One homeowner transformed their outdated bathroom into a contemporary oasis by using white microcement walls and pairing them with black fixtures and greenery. The result was a stunning, modern bathroom that feels both luxurious and welcoming.


